- Published on
Create a Mini Golf Game in Excel with VBA
- Authors

- Name
- James Hong
Excel Mini Golf Game
Ever wanted to turn your spreadsheet into a golf course? In this tutorial, we'll create a simple but entertaining mini golf game using Excel and VBA. Players will aim and shoot a golf ball across various obstacles to reach the hole in as few strokes as possible.
What You'll Learn
- Creating game elements using Excel cells and formatting
- Implementing basic physics for ball movement
- Building mouse interaction for aiming and power control
- Designing multiple game levels with increasing difficulty
- Tracking player score and game state
Final Result Preview
When you complete this tutorial, you'll have a fully playable mini golf game with:
- A golf ball you can aim and shoot
- Walls and obstacles that affect ball movement
- A scoring system that tracks your strokes
- Multiple levels with different layouts
Requirements
- Microsoft Excel (2010 or newer)
- Basic Excel knowledge
- Very basic understanding of VBA (but we'll guide you through everything!)
Let's Get Started!
Step 1: Set Up Your Worksheet
First, let's create our game environment:
- Open a new Excel workbook
- Right-click on Sheet1 and rename it to "MiniGolf"
- Set column widths to create square cells: select all columns (Ctrl+A), then right-click and set the width to 2.5
- Similarly, set all row heights to 15 pixels
- Turn off gridlines: View tab → uncheck "Gridlines"
Step 2: Design Your First Golf Course
Let's create a simple golf course:
- Select cells B2 through S20 and fill them with light green (RGB: 200, 255, 200) for the grass
- Create walls by coloring cells D4 through D15 in dark gray (RGB: 100, 100, 100)
- Create the starting position by coloring cell E5 in yellow
- Create the hole by coloring cell P15 in black
Your course should look something like this: 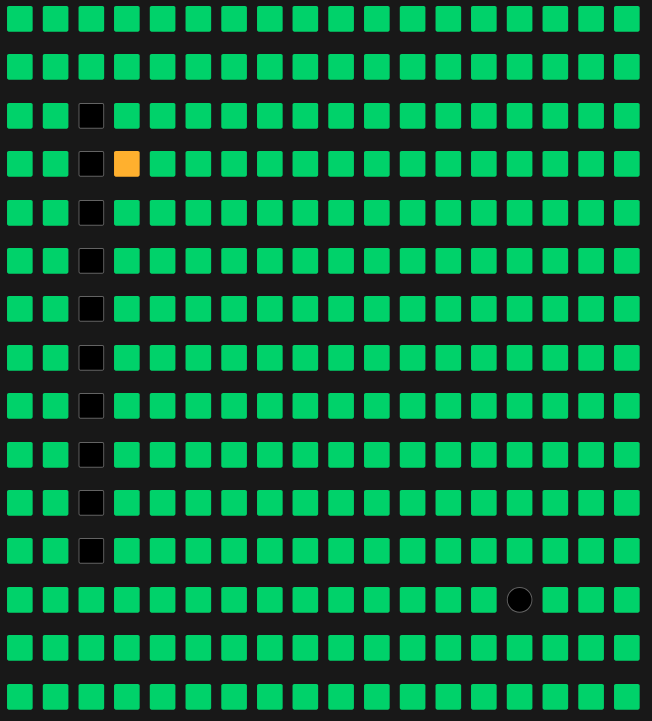
Step 3: Add Game Controls
Let's add some UI elements:
- In cell T3, type "Strokes:"
- In cell U3, enter "0" (this will track the player's strokes)
- In cell T5, type "Level:"
- In cell U5, enter "1"
- In cell T7, type "Aim:"
- Format all these cells with a larger font (14pt)
Step 4: Add the VBA Code
Now, let's add the VBA code that will power our game:
- Press Alt+F11 to open the VBA Editor
- Right-click on "VBAProject" in the Project Explorer
- Select Insert → Module
- Copy and paste the following code:
Option Explicit

' Game variables
Dim BallX As Integer, BallY As Integer
Dim InitialX As Integer, InitialY As Integer
Dim HoleX As Integer, HoleY As Integer
Dim VelocityX As Double, VelocityY As Double
Dim IsMoving As Boolean
Dim AimX As Integer, AimY As Integer
Dim Power As Double
Dim Strokes As Integer
Dim CurrentLevel As Integer
Dim IsDragging As Boolean

' Constants
Const Friction = 0.95
Const MinVelocity = 0.1
Const MaxPower = 10

Sub InitializeGame()
    ' Set up initial game state
    CurrentLevel = 1
    Strokes = 0
    Range("U3").Value = Strokes
    Range("U5").Value = CurrentLevel

    ' Load first level
    LoadLevel CurrentLevel

    ' Set up event handling
    Application.OnKey "{ESC}", "ResetBall"

    ' Initialize aiming variables
    IsDragging = False

    MsgBox "Welcome to Excel Mini Golf!" & vbCrLf & vbCrLf & _
           "Click and drag from the ball to aim." & vbCrLf & _
           "Release to shoot." & vbCrLf & _
           "Press ESC to reset the ball.", vbInformation
End Sub

Sub LoadLevel(Level As Integer)
    ' Reset game board
    ClearBoard

    ' Create level based on level number
    Select Case Level
        Case 1
            ' Simple straight path with a wall
            CreateGrass 2, 2, 18, 19
            CreateWall 4, 4, 4, 15
            InitialX = 5: InitialY = 5
            HoleX = 16: HoleY = 15

        Case 2
            ' L-shaped course
            CreateGrass 2, 2, 18, 19
            CreateWall 4, 4, 15, 4
            CreateWall 15, 5, 15, 15
            InitialX = 5: InitialY = 5
            HoleX = 16: HoleY = 16

        Case 3
            ' More complex with islands
            CreateGrass 2, 2, 18, 19
            CreateWall 5, 5, 5, 15
            CreateWall 10, 5, 10, 15
            CreateWall 15, 5, 15, 15
            CreateWall 7, 10, 13, 10
            InitialX = 3: InitialY = 3
            HoleX = 17: HoleY = 17

        Case Else
            ' If we've completed all levels, show victory message
            MsgBox "Congratulations! You've completed all levels with " & Strokes & " total strokes!", vbInformation
            Exit Sub
    End Select

    ' Place ball and hole
    PlaceBall InitialX, InitialY
    PlaceHole HoleX, HoleY

    ' Reset game state
    BallX = InitialX
    BallY = InitialY
    VelocityX = 0
    VelocityY = 0
    IsMoving = False

    Range("U5").Value = CurrentLevel
End Sub

Sub CreateGrass(x1 As Integer, y1 As Integer, x2 As Integer, y2 As Integer)
    ' Create grass (light green background)
    With Range(Cells(y1, x1), Cells(y2, x2))
        .Interior.Color = RGB(200, 255, 200)
    End With
End Sub

Sub CreateWall(x1 As Integer, y1 As Integer, x2 As Integer, y2 As Integer)
    ' Create wall (dark gray background)
    With Range(Cells(y1, x1), Cells(y2, x2))
        .Interior.Color = RGB(100, 100, 100)
    End With
End Sub

Sub PlaceBall(x As Integer, y As Integer)
    ' Place the golf ball (white circle on light blue background)
    With Cells(y, x)
        .Interior.Color = RGB(255, 255, 255)
        .Font.Color = RGB(0, 0, 0)
        .Value = "●"
        .HorizontalAlignment = xlCenter
        .VerticalAlignment = xlCenter
    End With
End Sub

Sub PlaceHole(x As Integer, y As Integer)
    ' Place the hole (black circle)
    With Cells(y, x)
        .Interior.Color = RGB(0, 0, 0)
        .Font.Color = RGB(255, 255, 255)
        .Value = "○"
        .HorizontalAlignment = xlCenter
        .VerticalAlignment = xlCenter
    End With
End Sub

Sub ClearBoard()
    ' Clear all cell contents and formatting in the game area
    With Range("B2:S20")
        .ClearContents
        .Interior.ColorIndex = xlNone
    End With
End Sub

Sub ResetBall()
    ' Reset ball to starting position
    If IsMoving Then Exit Sub

    ' Clear previous ball position
    Cells(BallY, BallX).ClearContents
    Cells(BallY, BallX).Interior.Color = RGB(200, 255, 200)

    ' Place ball at initial position
    BallX = InitialX
    BallY = InitialY
    PlaceBall BallX, BallY

    ' Reset velocity
    VelocityX = 0
    VelocityY = 0
End Sub

Sub Worksheet_MouseDown(ByVal Button As Integer, ByVal Shift As Integer, ByVal X As Single, ByVal Y As Single)
    ' Handle mouse down event
    If IsMoving Then Exit Sub

    ' Convert mouse coordinates to cell coordinates
    Dim CellX As Integer, CellY As Integer
    CellX = ActiveSheet.HitTest(X, Y).Column
    CellY = ActiveSheet.HitTest(X, Y).Row

    ' Check if click is on the ball
    If CellX = BallX And CellY = BallY Then
        IsDragging = True
        AimX = CellX
        AimY = CellY
    End If
End Sub

Sub Worksheet_MouseMove(ByVal Button As Integer, ByVal Shift As Integer, ByVal X As Single, ByVal Y As Single)
    ' Handle mouse move event for aiming
    If Not IsDragging Then Exit Sub

    ' Convert mouse coordinates to cell coordinates
    Dim CellX As Integer, CellY As Integer
    CellX = ActiveSheet.HitTest(X, Y).Column
    CellY = ActiveSheet.HitTest(X, Y).Row

    ' Update aim coordinates
    AimX = CellX
    AimY = CellY

    ' Draw aim line (this would be better with graphics, but we'll use cell values)
    Range("U7").Value = "Angle: " & Int(GetAngle(BallX, BallY, AimX, AimY)) & "°"

    ' Calculate power based on distance
    Power = GetDistance(BallX, BallY, AimX, AimY)
    If Power > MaxPower Then Power = MaxPower

    Range("T9").Value = "Power:"
    Range("U9").Value = Int((Power / MaxPower) * 100) & "%"
End Sub

Sub Worksheet_MouseUp(ByVal Button As Integer, ByVal Shift As Integer, ByVal X As Single, ByVal Y As Single)
    ' Handle mouse up event for shooting
    If Not IsDragging Then Exit Sub

    ' End drag
    IsDragging = False

    ' Calculate velocity based on aim
    Dim Angle As Double
    Angle = GetAngle(BallX, BallY, AimX, AimY)

    ' Convert angle to radians
    Dim Radians As Double
    Radians = Angle * 3.14159 / 180

    ' Set velocity based on power and angle
    VelocityX = -Cos(Radians) * (Power / 2)
    VelocityY = -Sin(Radians) * (Power / 2)

    ' Increment stroke count
    Strokes = Strokes + 1
    Range("U3").Value = Strokes

    ' Start ball movement
    IsMoving = True
    Application.OnTime Now + TimeValue("00:00:01"), "MoveBall"
End Sub

Function GetAngle(X1 As Integer, Y1 As Integer, X2 As Integer, Y2 As Integer) As Double
    ' Calculate angle between two points
    If X2 = X1 Then
        If Y2 < Y1 Then
            GetAngle = 90
        Else
            GetAngle = 270
        End If
    Else
        GetAngle = Atn((Y1 - Y2) / (X1 - X2)) * 180 / 3.14159
        If X2 < X1 Then GetAngle = GetAngle + 180
    End If

    ' Ensure angle is between 0 and 360
    While GetAngle < 0
        GetAngle = GetAngle + 360
    Wend

    While GetAngle >= 360
        GetAngle = GetAngle - 360
    Wend
End Function

Function GetDistance(X1 As Integer, Y1 As Integer, X2 As Integer, Y2 As Integer) As Double
    ' Calculate distance between two points using Pythagorean theorem
    GetDistance = Sqr((X2 - X1) ^ 2 + (Y2 - Y1) ^ 2)
End Function

Sub MoveBall()
    ' Move the ball based on current velocity
    If Not IsMoving Then Exit Sub

    ' Apply friction
    VelocityX = VelocityX * Friction
    VelocityY = VelocityY * Friction

    ' Check if ball has stopped
    If Abs(VelocityX) < MinVelocity And Abs(VelocityY) < MinVelocity Then
        IsMoving = False
        VelocityX = 0
        VelocityY = 0

        ' Check if ball is in hole
        If BallX = HoleX And BallY = HoleY Then
            MsgBox "Hole in " & Strokes & " strokes!", vbInformation

            ' Move to next level
            CurrentLevel = CurrentLevel + 1
            LoadLevel CurrentLevel
        End If

        Exit Sub
    End If

    ' Calculate new position
    Dim NewX As Integer, NewY As Integer
    NewX = BallX + Int(VelocityX)
    NewY = BallY + Int(VelocityY)

    ' Check for collisions with walls
    If Cells(NewY, NewX).Interior.Color = RGB(100, 100, 100) Then
        ' Determine which direction collision occurred
        If NewX <> BallX And NewY <> BallY Then
            ' Diagonal collision - check both directions
            If Cells(BallY, NewX).Interior.Color = RGB(100, 100, 100) Then
                ' Horizontal collision
                VelocityX = -VelocityX * 0.8
                NewX = BallX
            End If

            If Cells(NewY, BallX).Interior.Color = RGB(100, 100, 100) Then
                ' Vertical collision
                VelocityY = -VelocityY * 0.8
                NewY = BallY
            End If

            ' If both directions have walls, bounce back
            If Cells(BallY, NewX).Interior.Color = RGB(100, 100, 100) And _
               Cells(NewY, BallX).Interior.Color = RGB(100, 100, 100) Then
                VelocityX = -VelocityX * 0.8
                VelocityY = -VelocityY * 0.8
                NewX = BallX
                NewY = BallY
            End If
        ElseIf NewX <> BallX Then
            ' Horizontal collision
            VelocityX = -VelocityX * 0.8
            NewX = BallX
        ElseIf NewY <> BallY Then
            ' Vertical collision
            VelocityY = -VelocityY * 0.8
            NewY = BallY
        End If
    End If

    ' Check if new position is out of bounds
    If NewX < 2 Or NewX > 19 Or NewY < 2 Or NewY > 19 Then
        ' Bounce off the edge
        If NewX < 2 Or NewX > 19 Then VelocityX = -VelocityX * 0.8
        If NewY < 2 Or NewY > 19 Then VelocityY = -VelocityY * 0.8

        ' Adjust position to stay in bounds
        NewX = Application.WorksheetFunction.Max(2, Application.WorksheetFunction.Min(19, NewX))
        NewY = Application.WorksheetFunction.Max(2, Application.WorksheetFunction.Min(19, NewY))
    End If

    ' Only update if position actually changed
    If NewX <> BallX Or NewY <> BallY Then
        ' Clear previous position
        Dim OldColor As Long
        OldColor = Cells(BallY, BallX).Interior.Color

        ' If not the hole, restore to grass color
        If Not (BallX = HoleX And BallY = HoleY) Then
            Cells(BallY, BallX).ClearContents
            Cells(BallY, BallX).Interior.Color = RGB(200, 255, 200)
        Else
            ' Restore hole appearance
            PlaceHole HoleX, HoleY
        End If

        ' Update ball position
        BallX = NewX
        BallY = NewY

        ' Draw ball at new position (unless it's in the hole)
        If Not (BallX = HoleX And BallY = HoleY) Then
            PlaceBall BallX, BallY
        End If
    End If

    ' Schedule next movement
    Application.OnTime Now + TimeValue("00:00:0.1"), "MoveBall"
End Sub

Sub StartGame()
    ' Entry point for the game
    InitializeGame
End Sub
Step 5: Create a Button to Start the Game
- Go back to Excel
- Go to the Developer tab (if you don't see it, go to File → Options → Customize Ribbon and check "Developer")
- Click "Insert" and add a Button (Form Control)
- Draw the button near the top of your sheet
- When prompted to assign a macro, select "StartGame"
- Right-click the button and select "Edit Text," then name it "Start Game"
Step 6: Make the Worksheet Events Work
The code we provided includes MouseDown, MouseMove, and MouseUp event handlers, but they need to be placed in the correct location:
- Right-click on the "MiniGolf" sheet in the Project Explorer
- Select "View Code"
- Copy these three procedures from the module we created earlier and paste them into this code window:
Worksheet_MouseDownWorksheet_MouseMoveWorksheet_MouseUp
- Delete these procedures from the original module to avoid conflicts
Step 7: Test and Play!
- Go back to Excel
- Click the "Start Game" button
- Follow the instructions in the popup dialog
- Click and drag from the ball to aim, then release to shoot
- Try to get the ball in the hole with as few strokes as possible!
How It Works
Let's break down the key components of our mini golf game:
Physics Simulation
The ball movement is simulated using basic physics:
- Velocity is calculated based on the angle and power of your shot
- Friction gradually slows the ball down
- Collisions with walls cause the ball to bounce in a realistic way
User Interaction
The game uses Excel's worksheet events to:
- Detect when you click on the ball (MouseDown)
- Calculate aiming angle and power as you drag (MouseMove)
- Shoot the ball when you release the mouse button (MouseUp)
Game Progression
The game includes:
- Multiple levels with increasing difficulty
- A stroke counter to track your score
- Level advancement when you get the ball in the hole
Customization Ideas
Once you've built the basic game, try adding these enhancements:
- Sand Traps: Add yellow cells that slow the ball down more than regular grass
- Water Hazards: Add blue cells that reset the ball if hit
- Par Scores: Add par scores for each level and track whether player is under/over par
- Sound Effects: Add sound when the ball hits a wall or goes in the hole
- Custom Course Designer: Create a UI for designing your own courses
Troubleshooting
If you encounter issues:
- Make sure you've enabled macros in Excel
- Check that the worksheet events are in the Sheet1 code module, not the general module
- Ensure your Excel security settings allow running VBA code
Conclusion
Congratulations! You've created a fully functional mini golf game in Excel. This project demonstrates that Excel can be much more than just a spreadsheet tool—it can be a platform for creating fun, interactive games.
By building this game, you've learned about:
- Basic game physics and collision detection
- User interaction in Excel
- VBA programming techniques
- Game design principles
I hope you enjoyed this tutorial and that it inspires you to create more Excel games in the future!
Download
You can download the completed Excel Mini Golf game here.